
Why this matters
TikTok’s ad platform is only as good as the data feeding it. Without the TikTok Pixel firing correctly, your campaign optimization is running on guesses. This guide walks you through how to install the TikTok Pixel using Google Tag Manager, set up standard conversion events, and verify everything is working before you spend another dollar.
Prerequisites
- A TikTok Ads Manager account
- Google Tag Manager container already installed and published on your site
- Your TikTok Pixel ID (found in TikTok Ads Manager under Assets > Events)
- Access to your site’s key conversion pages (thank-you page, etc.)
- GTM Preview mode access to verify before publishing
If you have not set up GTM on your site yet, get that done first. The TikTok Pixel installs inside your GTM container, so GTM needs to already be live. If you are also running Google Ads, check out the guide on setting up Google Ads conversion tracking in GTM once you are done here, since the workflow is nearly identical.
Step 1: Get your TikTok Pixel ID
Before opening GTM, grab your Pixel ID from TikTok Ads Manager.
- Log in to TikTok Ads Manager at ads.tiktok.com.
- Go to Assets, then Events. In the top navigation, click Assets, then select Events from the dropdown.
- Click “Manage” next to Web Events. If you have not created a pixel yet, click Create Pixel.
- Select “TikTok Pixel” as the connection method, then choose Install Manually when prompted. You do not want TikTok to auto-install anything since GTM is handling the deployment.
- Copy your Pixel ID. It is a string that looks like
CFXXXXXXXXXXXXXXXX. Keep this tab open or paste it somewhere safe. You will need it in GTM.
Step 2: Create a Constant Variable for your Pixel ID
Store your Pixel ID as a Constant variable in GTM. This way, if your Pixel ID ever changes, you update it in one place rather than hunting through every tag.
- In GTM, go to Variables and click New under User-Defined Variables.
- Select Constant as the variable type.
- Paste your Pixel ID into the Value field.
- Name the variable: Constant – TikTok Pixel ID
- Save it.
The CONST prefix signals that this is a static value, not something pulled from the data layer or a cookie. Consistent naming conventions matter as your GTM container grows. You will thank yourself later when you are scanning a list of 40 variables.
Step 3: Create data layer variables for conversion data
For conversion events like Purchase, you need to pass dynamic values such as order value, currency, and order ID. Create Data Layer Variables to read those values from your site’s data layer.
Variable 1: DLV – value
- Variable type: Data Layer Variable
- Data Layer Variable Name:
ecommerce.value - Name it: DLV – value
Variable 2: DLV – currency
- Variable type: Data Layer Variable
- Data Layer Variable Name:
ecommerce.currency - Name it: DLV – currency
Variable 3: DLV – transaction_id
- Variable type: Data Layer Variable
- Data Layer Variable Name:
ecommerce.transaction_id - Name it: DLV – transaction_id
If you already built these variables for a GA4 or Google Ads tag, you do not need to recreate them. They are reusable across all tags in your container. That is one of the core advantages of managing everything through GTM.
Step 4: Build the TikTok base pixel tag
The base pixel is the TikTok tracking script that loads on every page. It initializes the pixel and fires a PageView event automatically. This tag fires site-wide on every page load.
- In GTM, go to Tags and click New.
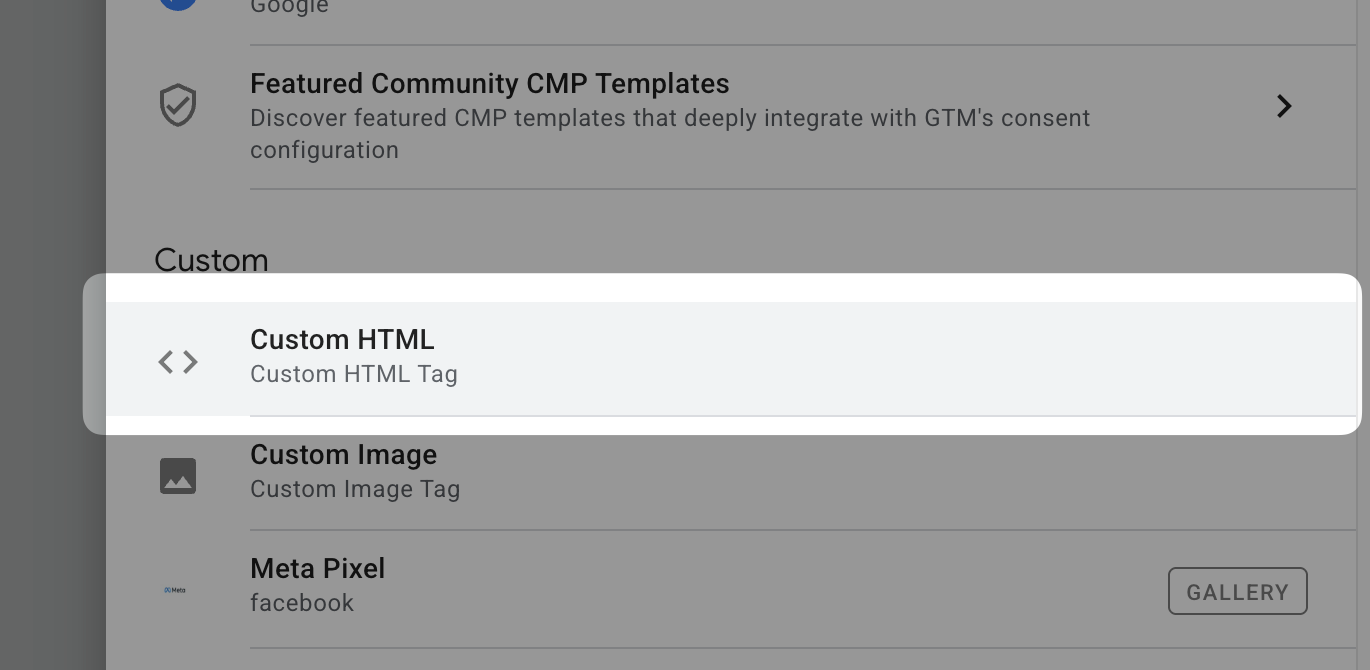
- Click Tag Configuration and select Custom HTML.
- Paste the following code into the HTML field:
<script>
!function (w, d, t) {
  w.TiktokAnalyticsObject=t;var ttq=w[t]=w[t]||[];
  ttq.methods=["page","track","identify","instances","debug","on","off","once",
    "ready","alias","group","enableCookie","disableCookie"];
  ttq.setAndDefer=function(t,e){t[e]=function(){
    t.push([e].concat(Array.prototype.slice.call(arguments,0)))}};
  for(var i=0;i<ttq.methods.length;i++)ttq.setAndDefer(ttq,ttq.methods[i]);
  ttq.instance=function(t){for(
    var e=ttq._i[t]||[],n=0;n<ttq.methods.length;n++)
    ttq.setAndDefer(e,ttq.methods[n]);return e};
  ttq.load=function(e,n){
    var i="https://analytics.tiktok.com/i18n/pixel/events.js";
    ttq._i=ttq._i||{};ttq._i[e]=[];ttq._i[e]._u=i;
    ttq._t=ttq._t||{};ttq._t[e]=+new Date;
    ttq._o=ttq._o||{};ttq._o[e]=n||{};
    var o=document.createElement("script");
    o.type="text/javascript";o.async=!0;
    o.src=i+"?sdkid="+e+"&lib="+t;
    var a=document.getElementsByTagName("script")[0];
    a.parentNode.insertBefore(o,a)};
  ttq.load('{{Constant - TikTok Pixel ID}}');
  ttq.page();
}(window, document, 'ttq');
</script>
- Under Triggering, select All Pages.
- Name the tag: TikTok – Configuration (This is your base pixel)
- Save the tag.
Notice the variable reference {{Constant - TikTok Pixel ID}} in the script. GTM replaces that placeholder with your actual Pixel ID at runtime. That is why you stored it as a Constant variable in Step 2 instead of pasting the ID directly into the code.
Step 5: Create the Purchase conversion event tag
The base pixel tag handles PageView. For purchase conversion tracking, you need a second tag that fires only when a transaction is completed and passes the order data to TikTok.
- In GTM, go to Tags and click New.
- Click Tag Configuration and select Custom HTML.
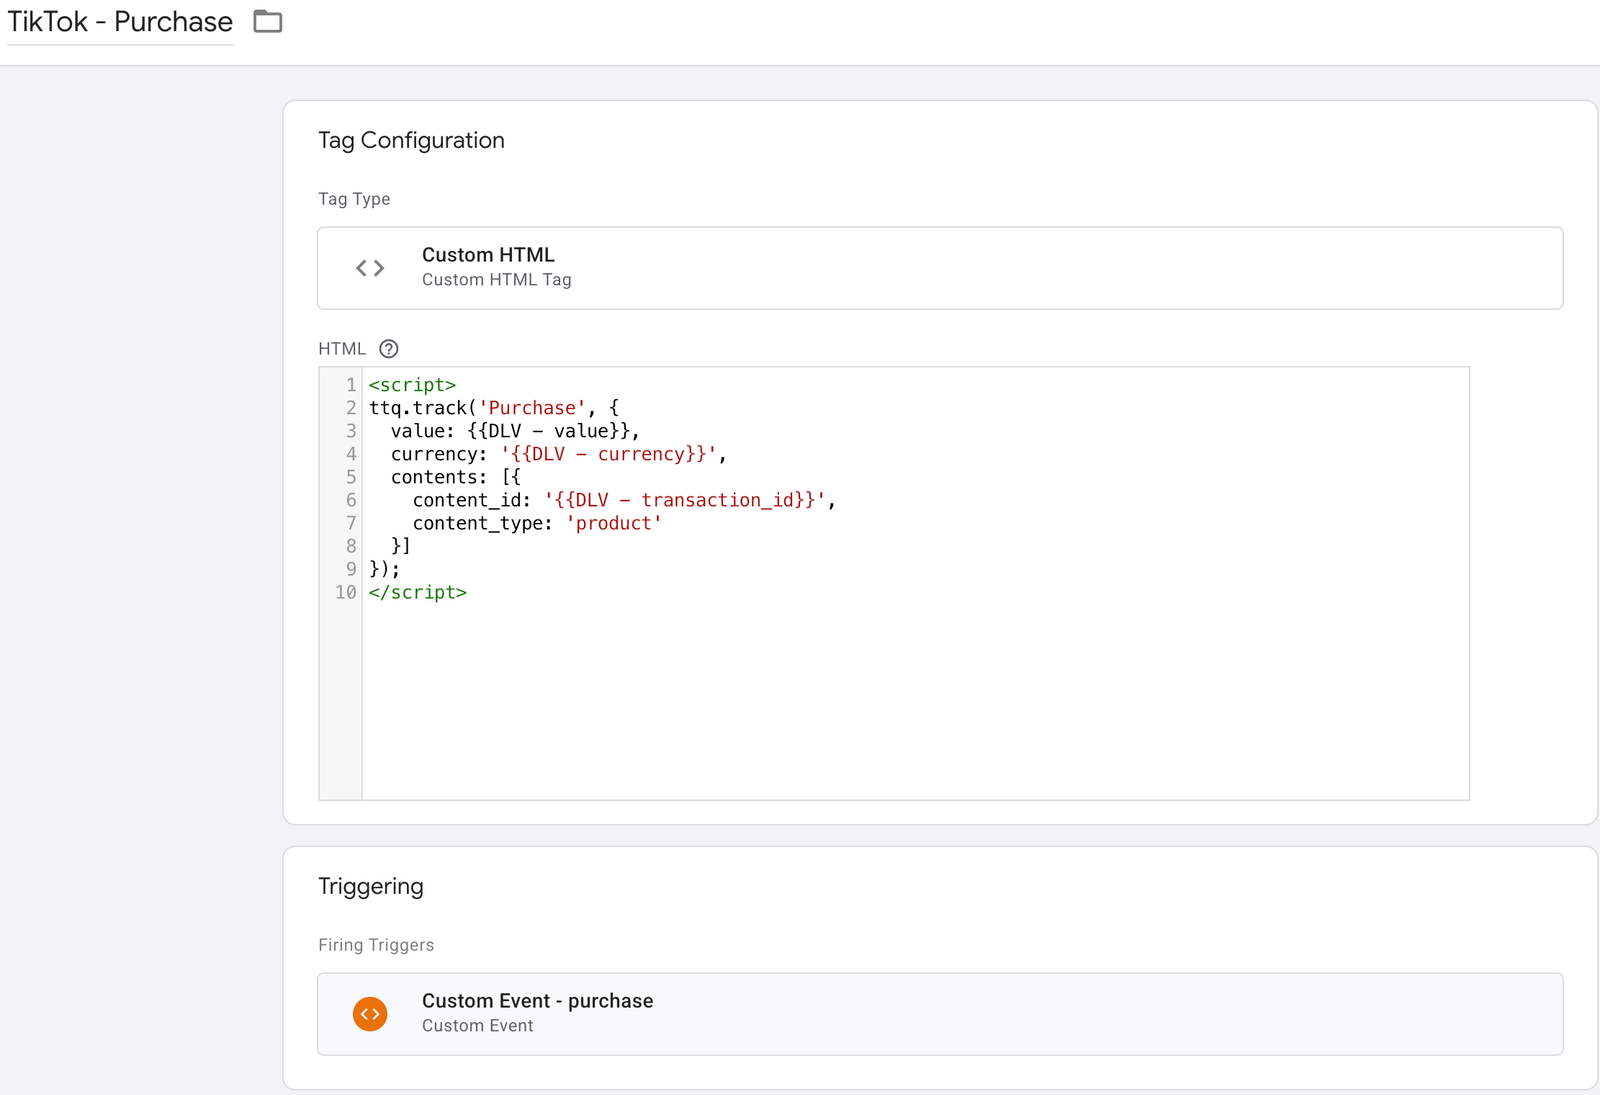
- Paste the following code:
<script>
ttq.track('Purchase', {
  value: {{DLV - value}},
  currency: '{{DLV - currency}}',
  contents: [{
    content_id: '{{DLV - transaction_id}}',
    content_type: 'product'
  }]
});
</script>
- Under Advanced Settings, expand Tag Sequencing and check Fire a tag before this tag fires. Select TikTok – Configuration. This guarantees the
ttqobject is initialized before the event code runs. - Under Triggering, select your purchase Custom Event trigger. If you followed the Google Ads conversion tracking guide, you already have a Custom Event – purchase trigger. Use that same one here.
- Name the tag: TikTok – Purchase
- Save the tag.
Step 6: Verify in GTM Preview mode
- Click Preview in the top right of GTM.
- Enter your site URL and click Connect.
- Navigate your site and confirm TikTok – Configuration appears under Tags Fired on every page load.
- Complete a test purchase using a dev environment or a low-value test product.
- In the GTM debug panel, click on the purchase event in the left sidebar.
- Under the Tags tab, confirm TikTok – Purchase appears under Tags Fired.
- Expand the tag and confirm value, currency, and content_id are all populated with real values, not
undefined.
If any variable shows undefined, open the Data Layer tab in Preview and check the exact key structure your site is pushing. The variable name in GTM must match the key your site pushes exactly, including capitalization and nesting.
Step 7: Verify with TikTok Pixel Helper
TikTok has a Chrome extension called TikTok Pixel Helper that shows you in real time whether the pixel is firing and what data is being sent. Install it from the Chrome Web Store, then visit your site and run through the same test purchase flow.
In the Pixel Helper panel, look for:
- A green checkmark next to the PageView event on every page
- A green checkmark next to the Purchase event on the confirmation page
- Correct values for
value,currency, andcontent_idin the event details
Any red or yellow warnings need to be resolved before you publish. Common issues the Pixel Helper surfaces: missing required parameters, duplicate pixel fires, and events firing on the wrong pages.
Step 8: Publish your GTM container
- Once Preview mode and Pixel Helper both look clean, click Submit in GTM.
- Give your version a clear name: Add TikTok configuration and Purchase event.
- Click Publish.
- Back in TikTok Ads Manager, go to Assets > Events and check the pixel status. It will move from Inactive to Active once real traffic and events start coming in. This can take a few hours after a real purchase fires.
What other standard events should you track?
Purchase is the most important event, but TikTok supports a full set of standard events that feed its optimization algorithm. The more signals you give it, the better its targeting. Common ones worth setting up:
- ViewContent — Fires on product detail pages. Tells TikTok which products people are looking at.
- AddToCart — Fires when a product is added to the cart. Useful for retargeting warm audiences.
- InitiateCheckout — Fires when someone starts the checkout process. Good for abandoned checkout campaigns.
- CompleteRegistration — Fires when a user signs up or creates an account. Relevant for lead gen or SaaS.
- SubmitForm — Fires on form submissions. Pair this with the trigger setup from the GTM form submission tracking guide to capture lead gen conversions.
Each of these follows the same pattern as the Purchase tag: a Custom HTML tag with ttq.track('EventName', {...}), a relevant Custom Event trigger, and tag sequencing set to fire after the base pixel.
Common mistakes
Not using tag sequencing on the event tags. Your Purchase tag calls ttq.track(), which only works if ttq has already been initialized by the base pixel. If you skip tag sequencing, you will get intermittent failures depending on tag load order. Always set your event tags to fire after the base pixel.
Hardcoding the Pixel ID directly in the script. If you paste your Pixel ID into the Custom HTML code instead of referencing {{CONST - TikTok Pixel ID}}, you will have to update every single tag manually if the ID ever changes. Use the variable.
Using a Page View trigger on the confirmation page instead of a Custom Event trigger. Firing the Purchase event on a URL match works until someone bookmarks the confirmation page, hits the back button, or shares the link. The Custom Event trigger on purchase only fires when your data layer explicitly pushes the event, which is far more reliable.
Skipping the Pixel Helper check. GTM Preview tells you the tag fired. The Pixel Helper tells you TikTok actually received the data and found it valid. Both checks matter. Do not skip either one.
Firing the base pixel on specific pages only. The base pixel should fire on every single page. TikTok uses full session data including PageView events across your site to build audiences and optimize delivery. Restricting it to a subset of pages limits the signal you are sending and hurts campaign performance.
Need help getting your TikTok Pixel set up correctly?
At Ryker Analytics, we set up and audit pixel implementations for businesses that need accurate conversion data before scaling their ad spend. If your pixel is showing inactive, your purchase values are coming through wrong, or you want a full audit of what is and is not firing across your paid channels, get in touch.
2 Responses
This guide does a great job of breaking down the TikTok Pixel setup in GTM step by step. I especially appreciate the emphasis on verifying events in GTM Preview before publishing, since skipping that can lead to inaccurate tracking. It might also help to mention common troubleshooting tips for when pixels don’t fire as expected on conversion pages.
Thanks for the feedback! Be sure to check the “Common mistakes” sections for common issues for the setup. Hope this helps!